
Table of contents for Blogging Add-ons
FeedBurner is an excellent blogging add-on service that makes your feeds more accessible to readers and easier to subscribe to. Plus, you can move your feed easily when you move to a different blog address without losing any subscribers. And (possibly my favorite part) you can see how many people subscribe to your blog (although the number isn’t exact). Or maybe this is my favorite part: it’s free.
 How many times have you clicked on a subscribe button and gotten something like this at right?
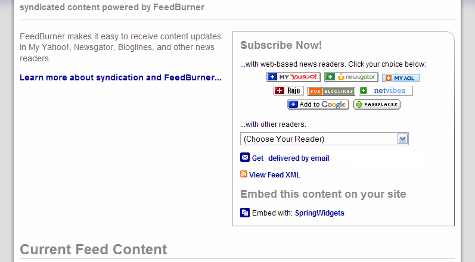
You don’t want to do that to your latest potential subscriber, do you? FeedBurner gives you a pretty subscribe page with tons of options:
And it’s really easy to do. Just go to the FeedBurner homepage:
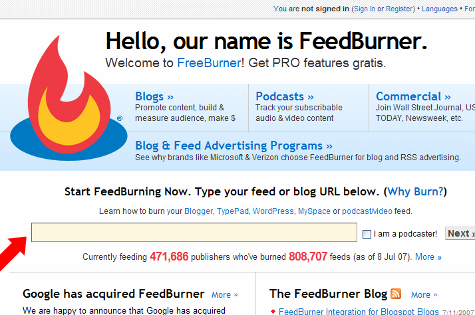
and type in your blog’s URL in the box (step 1).
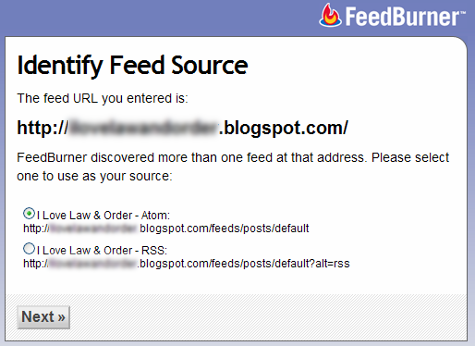
It finds your feed (if you have more than one, you get to choose which one to use, and in my opinion it doesn’t really make a difference which one you choose) and moves you along the sign up process (step 2).
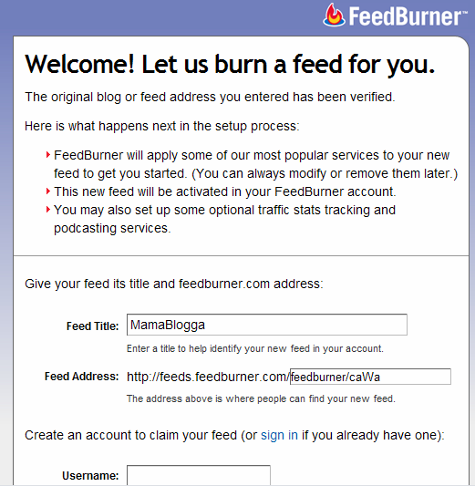
I recommend changing the name of your feed from (the second box, next to the red arrow above) to something more descriptive than /feedburner. (And the /caWa, as far as I know, isn’t necessary unless there’s another blog that’s already taken your desired feed name). Enter your information to create your account (steps 3 & 4).
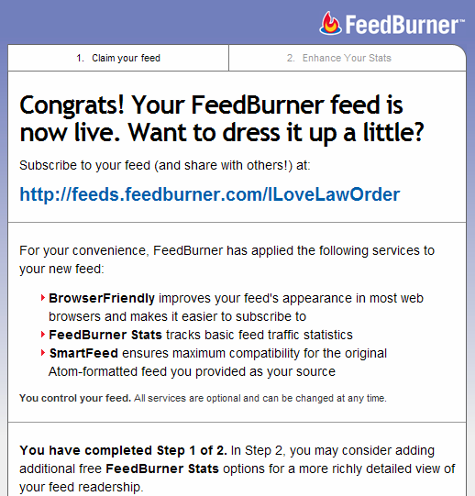
The default settings already activated are very useful. The second step here, “Enhance Your Stats,” offers you options to gather even more information about your subscribers.
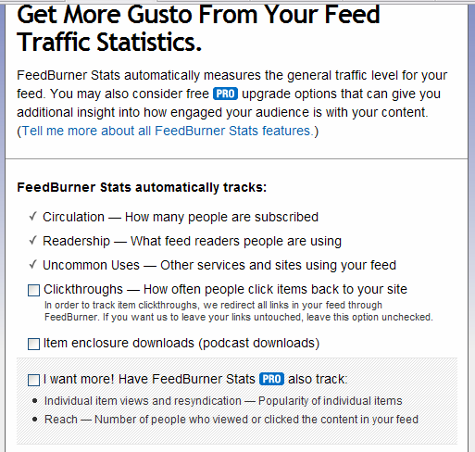
Additional options include tracking clickthroughs, to see which items your subscribers are clicking on. Generally, I recommend against using this, but the reason may not apply to you: using this service changes the actual link in feed readers (from, say, http://www.mamablogga.com/post-title-here/ to http://feeds.feedburner.com/~r/mamablogga/29057901384769018346/).
If you think people might link to your post using the URL from your feed (which happens a lot in professional blogs and link round ups, but not as much in the personal blogging arena), don’t allow clickthrough tracking. Otherwise, if you’re interested, you may check that box. If you’re podcasting, check the second box. The grey shaded box may function the same way the clickthrough tracking did; I haven’t tried that one myself yet (step 5).
Getting People to Subscribe to Your FeedBurner Feed
Now, even though you’ve “burned” your feed, you’ll need to make some changes on your blog to indicate that your subscribers shouldn’t use your default feed (which still exists on your blog and is the source for your FeedBurner feed).
Blogger
After Google’s recent acquisition of FeedBurner, Blogger has more fully integrated with FeedBurner.
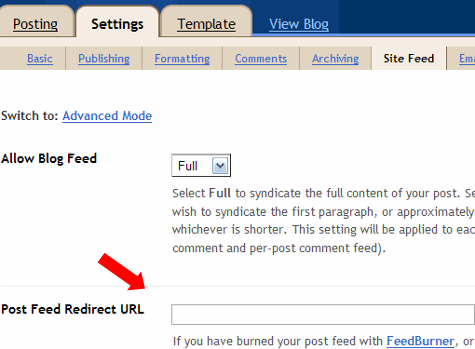
Go to Settings>Site Feed. In the Post Feed Redirect URL box, type the address of your newly burned FeedBurner feed (http://feeds.feedburner.com/WhateverYouNamedIt). Save your settings.
self-hosted WordPress
Use FeedBurner’s own FeedSmith FeedBurner Replacement Plugin, which directs your subscribers to your FeedBurner Feed automatically (again, you’ll have to enter your FeedBurner address). Once your plugin is installed and activated, you enter the address under the Options>FeedBurner FeedSmith tab.
TypePad
Go to Configure>Feeds. Find the FeedBurner section and click on the button to connect your feed with your FeedBurner feed. You’ll have to enter your FeedBurner login information, then you’ll be given the options to choose which of your FeedBurner feeds you want to associate with your blog. Save the changes (twice).
All platforms
No matter what blogging program you’re using, you’ll want to prominently promote your feed and encourage your readers to subscribe. FeedBurner’s own Chicklet Chooser (found under the Publicize tab) is one way to get subscription graphics in your design. I’ve also downloaded RSS Subscription graphics, opened them in photo editors and tweaked the colors until they matched my blogs.
Don’t forget to link to your FeedBurner address so when your readers click the picture, they’ll be taken to the right place!
Also: it’s always a good idea to offer an email feed for your readers who don’t use RSS or feed readers. FeedBurner offers an email feed option (also under the Publicize tab). I recommend offering a link to subscribe by email right next to the subscribe by RSS button.
FeedFlare?
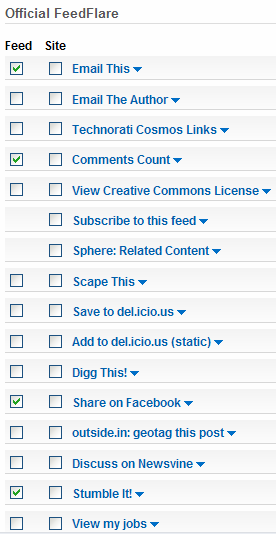 You can customize the way your feeds appear in feed readers with FeedBurner’s FeedFlares, found under the Optimize tag. You can add links to the bottom of your posts to add the story to social sites (like StumbleUpon or Digg), add a copyright notice, add a comment count, and lots more.
Additionally, you can add these to the bottom of posts on your site by checking the box in the ‘site’ column. Your on-site flares and your in-feed flares can be different.
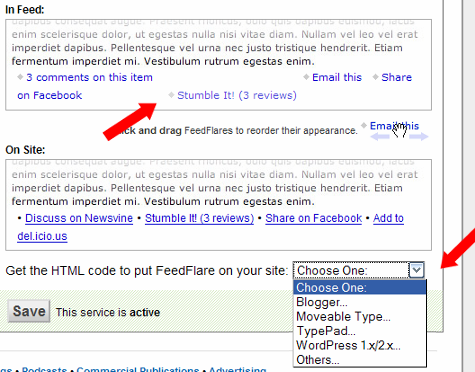
Scroll down to customize the order your FeedFlares appear in by dragging and dropping them within the In Feed and On Site boxes (the first arrow below). Be sure to use the pull-down menu below the On Site box to get the code and instructions for adding the flare to your site (the second arrow below). Don’t forget to activate the service!
Checking Your FeedBurner Stats
I check my FeedBurner stats at least once a day (I’m a data addict). I actually have a whole bookmarks folder of different stats and site measures that I use the “Open All in Tabs” option with at least once a day. The FeedBurner dashboard is one of those tabs, so I can see at a glance how many subscribers I have that day.
Check back next week to learn how to master FeedBurner!
Comments
27 responses to “5 Steps to Getting Started with FeedBurner”
Thanks for the info. I LOVE feedburner. I really think every blogger should use them. They are so easy, fun, and work great.
I *just* signed up with Feedburner last week and I am really liking it. Thanks so much, as always, for the helpful hints! I need to tweak my settings a bit based on what you have shared today.
I’d done all this before but still hadn’t seen the results on my own feed and was getting really frustrated – now, though, I think I’ve seen what I’ve done wrong! hooray! (We’ll see if they work now)
Good breakdown there.
I would love to have my own domain like you do. I read this stuff and I feel like a flipping idiot. You are so smart!
This is an awesome set of instruction. I know I’ll refer back to it often. I can never quite remember these things. (You must have some technical writer in you!)
Thanks for reading, ladies! Glad you found it useful!
I recently started with feedburner, and I LOVE it. I like being able to see how people got to my site, and where they went inside it.
Thanks for the info – you are awesome! I just used your instructions to set up feedburner for my blog – you are hitting all of the topics I need just as I need them… 🙂
I tried to get the FeedFlare on my blog but for some reason it just won’t work with my template. *sigh*
Yep, mine’s still not working either 🙁
@Kailani & Karen—Would you mind e-mailing me more details about the problems you’re having with FeedFlare? If I can help, I’ll try to include it in next week’s part 2.
I’m feeling incredibly stupid right now and hope you can help me. I followed the steps you have here. I got to the part about the plug in and went to their website, downloaded the plugin and then the instructions on their website say this:
2. Activate the plugin by logging into your WordPress administration area, clicking Plugins, then clicking Activate at the end of the “FeedBurner FeedSmith†row.
There is no tab for plugins that I can see. Am I totally missing something?? I am confused.
Thanks.
Michelle—I believe that you have to have self-hosted WordPress to use plugins (i.e. not blogname.wordpress.com).
[…] and full of useful items for the new blogger and includes links to other fantastic toolboxes. Got Feedburner? If you don’t already have a Feedburner account, here’s your chance to get a step by step […]
still learning from you!!!! I didn’t realize i could use feed flare on my page- silly me… off to my feedburner page I go!
I figured it out now. Once my servers are pointed in the right place, I’ll have to get this up and running. Your website is so helpful with all these cool plugins and feed information. Thanks for putting this on here for dummies like me!
[…] Build A Better Blog: Track Comments on Your TypePad ..Google makes FeedBurner PRO free | ShanKri-la5 Steps to Getting Started with FeedBurner | MamaBloggaFeedBurner FeedFlares give your RSS feeds and posts an added kick | One By […]
[…] 5 Steps to Getting Started With Feedburner (this is what I used when I first started – it’s a wonderful guide!). Also her related post, […]
Thanks for posting this – you’ll probably be pleased to hear I found you in the top 10 of Google with the search ‘feedburner stats button’
Phew, it’s a bit of a technical learning curve getting your head around all this blog stuff. Really appreciate the help.
Thank you so much for publishing this!!! It just saved me a huge amount of time. I just started blogging, so this was very helpful.
Glad to help Alissia! Be sure to look around for any other tutorials if you need more help, or email me.
Will do and I’ll also put a link on my website for you if you like…not that many people are reading my blog yet, but you never know!
[…] just their family and friends reading, and that’s OK. MamaBlogga has great article called 5 Steps to Getting Started with FeedBurner and another one called Seven Ways to Master FeedBurner and another called Five Ways to Win […]
Great instructions! Thank you.
I want to use feedburner for my blog.
If I’ve already selected the option for tracking clickthroughs, is there a way to undo it?
Yes. Go to Analyze>Configure Stats