We’re continuing our series on getting started with blogging, bouncing back to WordPress this week to look at the basics of posting and creating pages.
Previously, we looked at how to create your first post—but there’s a lot of information and options on the post page that we didn’t cover. To get to the edit post or add new post page, you can use your dashboard or the gray bar at the top of your screen when you’re logged in to WordPress. The Posts menu is on the left-hand side:

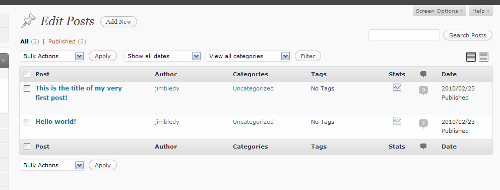
The Edit option takes you to a list of your posts (click to enlarge):
Here, the posts you’ve saved as drafts, published or scheduled on your blog are listed in chronological order. You can click on a post title to edit it individually. When you hover your cursor over the title of the post, you get additional options below the title: Edit (which does the same thing as clicking on the post title), Quick Edit (which lets you change things like tags, categories, title, and date right in the Edit Posts page), Trash (which moves the post to your trash, where you can salvage it later if you want), or View (to see what it would or does look like on your blog).
On the same line as each post title, you can also click on the author name to only show posts by a certain author, or the category name to narrow your view to posts in that category. Each post’s viewing stats and comments are also accessible from here.
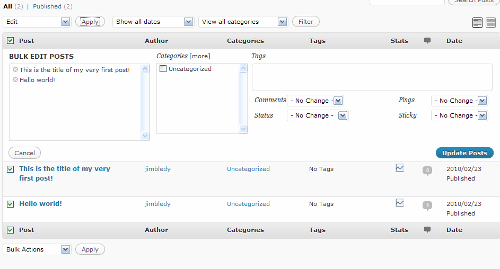
You can also edit multiple posts from this screen. Check the boxes next to the posts you want to edit and use the drop down menu labeled Bulk Actions to edit or delete multiple posts. This is waht it looks like when you choose to edit multiple posts (again, click to enlarge):
This way, you can change multiple posts into different categories, add tags to multiple posts and change whether they can have comments or are even published—many of the same things you can do for a single post in Quick Edit.
The next option on the Posts menu is Add New. (You can also add a new post by clicking on the New Post button on the top gray menu bar.) We looked at how to create and publish a post last time; this time we’ll look at the rest of the post options on this page.
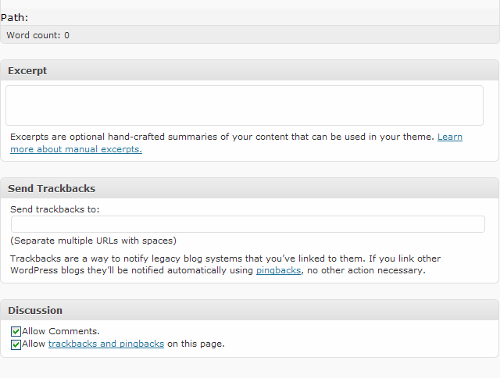
Below the post text box, there are three boxes for more information: Excerpt, Send Trackbacks, and Discussion. For the most part, these are pretty self-explanatory—especially since they include an explanation 😉 .
To the right of the post box, there are three more boxes with options: Publish, Post Tags and Categories:
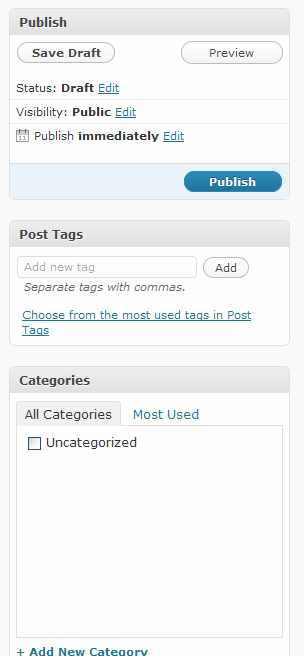
The Publish box has the Save Draft, Preview and Publish buttons. (Once you’ve published a post, these buttons are replaced with a Preview Changes button up top and an Update button on the bottom).
This box also has more options: You can click Edit by Draft to change the status from Draft to Pending Review (for drafts you’ve completed but aren’t ready to schedule). Once you’ve published, Published is added to this option list. Clicking Edit next to Visibility allows you to set a post as public, private or password-protected (by a password you set). Also under this option, you can set a post to always remain on the front page of your blog, such as a short post describing your blog or perhaps inviting visitors to introduce themselves.
The Post Tags box is used to add tags to a post. These are usually listed on your post and can let your users see all your posts on a particular, narrow topic. Tags are generally more specific than categories (the next box down): if you blog about knitting, for example, you might have a category for all your Projects, but tags for Finished Objects, Sweaters, Cardigans, etc. When adding tags, be sure to hit the Add button (or the Enter/Return key) AND save the post/draft to save them. (You can remove a tag by clicking the x next to it.)
The Categories box lets you categorize your posts by the broader topics of your blog. You can also add a new category from right inside this box—just click +Add New Category and you’ll get a text box to name your new category.
Note that the Add New Post page can be customized: you can drag and drop all six of these boxes to rearrange the page however you’d like.
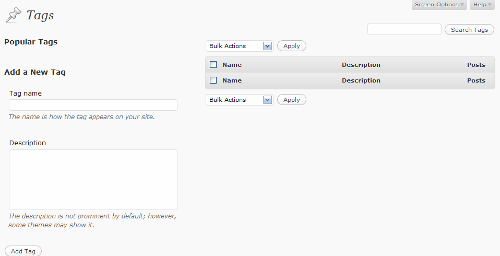
Also on the Posts menu are pages to manage all your tags and categories. The Manage Tags page (click to enlarge):
From here, you can add new tags, as well as edit the descriptions of existing tags. Once you’ve published posts with tags, your most used tags appear under Popular Tags. Also, an alphabetical list of the tags, their descriptions and the number of posts using those tags will appear to the right. As with posts, you can use the check boxes to select multiple tags to delete, or you can edit individual tags (such as to add a description) by clicking on the tag’s name. Clicking on the number of posts using them gives you a list of posts (on the Edit Posts page) using that tag.
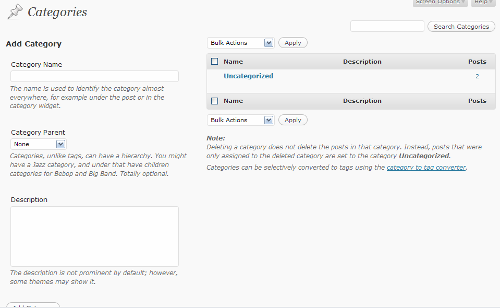
The Categories page is very similar (click to enlarge):
The most notable difference here is that “categories, unlike tags, can have a hierarchy.” Tags are all one level, but Categories can be “parents” or “children”—you can have one category broken up into multiple subcategories. With our knitting blog example, maybe under the Projects category, you have three subcategories: Cardigans, Pullovers and Socks.
(Why use subcategories instead of tags? If a topic is really central to the purpose of your blog and something you’ll be posting about frequently, but falls under the purview of a broader subject of your blog, a subcategory might be the perfect fit—but only you can decide what should be a tag and what should be a category.)
In addition to Posts, you can also have Pages on your blog. Posts are the temporal stuff—the day-to-day news updates, the regular content on your blog. Pages are for important information not tied to time, like your About or Contact pages. The Pages menu is further down on the left-hand side of WordPress:
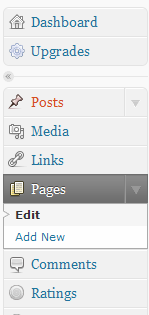
The two options, Edit and Add New, lead to pages almost identical to the Edit and Add New Posts pages.
The biggest difference in creating pages is that, like categories, you can have subordinate pages—for example, your About page might have child pages on your Biography, your Portfolio, etc. This is set in the Attributes box below the Publish box on the Edit or Add New Page page:
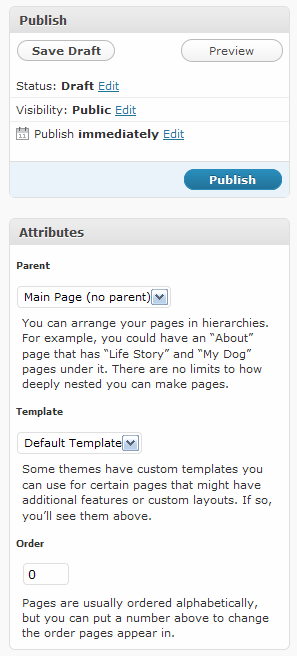
You can also use a custom template (if you dare) for certain pages—a different layout for a particular page, for example. The page Order determines what order your pages are displayed on your menu bar on your blog. If it’s not set, the pages are listed by date published.
Whew! Everything there is to know about the Posts and Pages menus on WordPress!
