Table of contents for Blogging Add-ons
FeedBurner is an excellent blogging add-on service that makes your feeds more accessible to readers and easier to subscribe to. Plus, you can move your feed easily when you move to a different blog address without losing any subscribers. And (possibly my favorite part) you can see how many people subscribe to your blog (although the number isn’t exact). Or maybe this is my favorite part: it’s free.
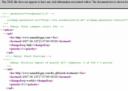 How many times have you clicked on a subscribe button and gotten something like this at right?
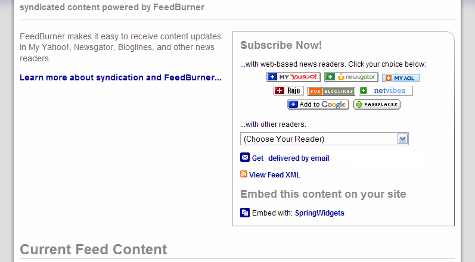
You don’t want to do that to your latest potential subscriber, do you? FeedBurner gives you a pretty subscribe page with tons of options:
And it’s really easy to do. Just go to the FeedBurner homepage:
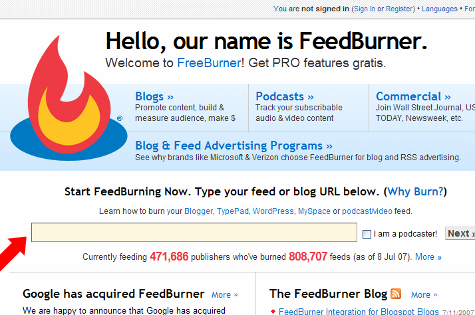
and type in your blog’s URL in the box (step 1).
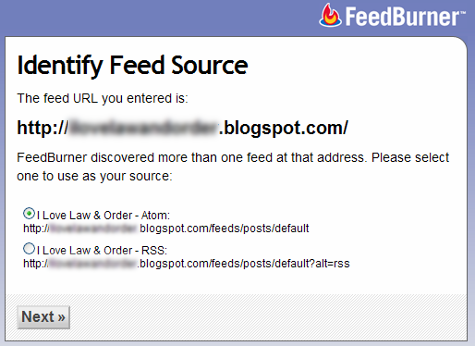
It finds your feed (if you have more than one, you get to choose which one to use, and in my opinion it doesn’t really make a difference which one you choose) and moves you along the sign up process (step 2).
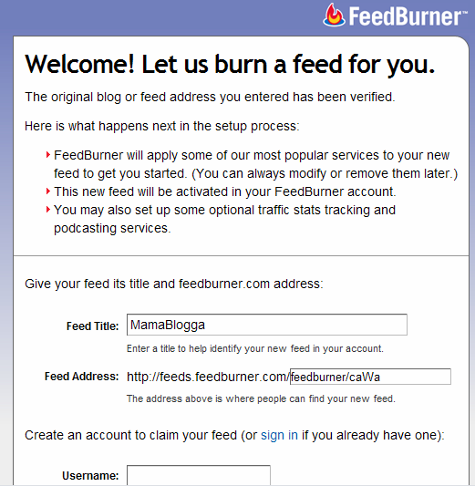
I recommend changing the name of your feed from (the second box, next to the red arrow above) to something more descriptive than /feedburner. (And the /caWa, as far as I know, isn’t necessary unless there’s another blog that’s already taken your desired feed name). Enter your information to create your account (steps 3 & 4).
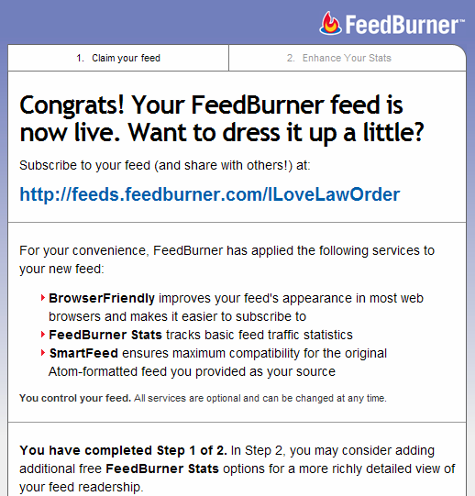
The default settings already activated are very useful. The second step here, “Enhance Your Stats,” offers you options to gather even more information about your subscribers.
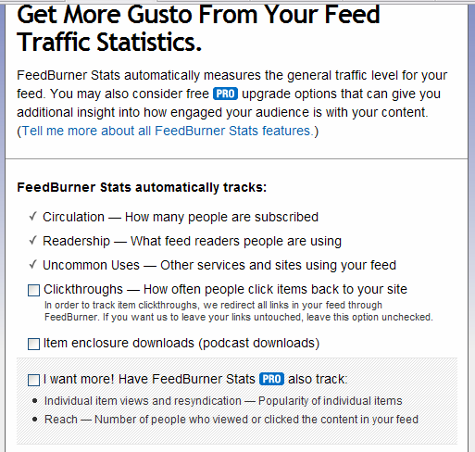
Additional options include tracking clickthroughs, to see which items your subscribers are clicking on. Generally, I recommend against using this, but the reason may not apply to you: using this service changes the actual link in feed readers (from, say, http://www.mamablogga.com/post-title-here/ to http://feeds.feedburner.com/~r/mamablogga/29057901384769018346/).
If you think people might link to your post using the URL from your feed (which happens a lot in professional blogs and link round ups, but not as much in the personal blogging arena), don’t allow clickthrough tracking. Otherwise, if you’re interested, you may check that box. If you’re podcasting, check the second box. The grey shaded box may function the same way the clickthrough tracking did; I haven’t tried that one myself yet (step 5).
Getting People to Subscribe to Your FeedBurner Feed
Now, even though you’ve “burned” your feed, you’ll need to make some changes on your blog to indicate that your subscribers shouldn’t use your default feed (which still exists on your blog and is the source for your FeedBurner feed).
Blogger
After Google’s recent acquisition of FeedBurner, Blogger has more fully integrated with FeedBurner.
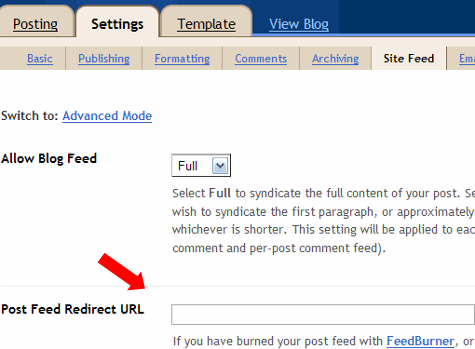
Go to Settings>Site Feed. In the Post Feed Redirect URL box, type the address of your newly burned FeedBurner feed (http://feeds.feedburner.com/WhateverYouNamedIt). Save your settings.
self-hosted WordPress
Use FeedBurner’s own FeedSmith FeedBurner Replacement Plugin, which directs your subscribers to your FeedBurner Feed automatically (again, you’ll have to enter your FeedBurner address). Once your plugin is installed and activated, you enter the address under the Options>FeedBurner FeedSmith tab.
TypePad
Go to Configure>Feeds. Find the FeedBurner section and click on the button to connect your feed with your FeedBurner feed. You’ll have to enter your FeedBurner login information, then you’ll be given the options to choose which of your FeedBurner feeds you want to associate with your blog. Save the changes (twice).
All platforms
No matter what blogging program you’re using, you’ll want to prominently promote your feed and encourage your readers to subscribe. FeedBurner’s own Chicklet Chooser (found under the Publicize tab) is one way to get subscription graphics in your design. I’ve also downloaded RSS Subscription graphics, opened them in photo editors and tweaked the colors until they matched my blogs.
Don’t forget to link to your FeedBurner address so when your readers click the picture, they’ll be taken to the right place!
Also: it’s always a good idea to offer an email feed for your readers who don’t use RSS or feed readers. FeedBurner offers an email feed option (also under the Publicize tab). I recommend offering a link to subscribe by email right next to the subscribe by RSS button.
FeedFlare?
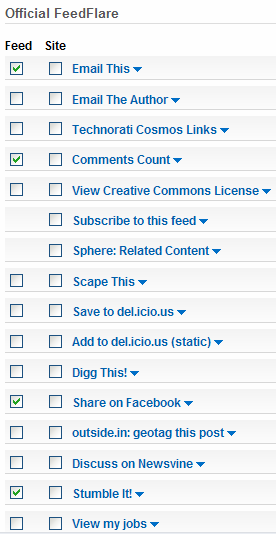 You can customize the way your feeds appear in feed readers with FeedBurner’s FeedFlares, found under the Optimize tag. You can add links to the bottom of your posts to add the story to social sites (like StumbleUpon or Digg), add a copyright notice, add a comment count, and lots more.
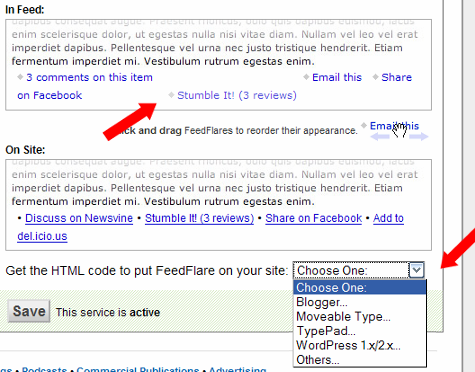
Additionally, you can add these to the bottom of posts on your site by checking the box in the ‘site’ column. Your on-site flares and your in-feed flares can be different.
Scroll down to customize the order your FeedFlares appear in by dragging and dropping them within the In Feed and On Site boxes (the first arrow below). Be sure to use the pull-down menu below the On Site box to get the code and instructions for adding the flare to your site (the second arrow below). Don’t forget to activate the service!
Checking Your FeedBurner Stats
I check my FeedBurner stats at least once a day (I’m a data addict). I actually have a whole bookmarks folder of different stats and site measures that I use the “Open All in Tabs” option with at least once a day. The FeedBurner dashboard is one of those tabs, so I can see at a glance how many subscribers I have that day.
Check back next week to learn how to master FeedBurner!


 Why is that so cool? It means that, should something terrible happen to FeedBurner, your subscribers are all subscribed to your domain and it will be easy to keep your subscribers and move them. Although BlueHost hasn’t been very helpful (why can’t I just make my own CNAMEs?!), this should be very easy to do, if a bit technical. Danny Sullivan of Search Engine Land wrote a
  line of your feed emails as well as their appearance. As with the Feed Image Burner, you can include a logo to remind readers what blog they’re reading. You can also customize your font (but you’re limited to the five major font families: Arial, Verdana, Trebuchet, Georgia and Times New Roman), size and color of text and links. As with the Headline Animator, using images and colors from your blog can provide a sense of continuity for your readers. My own logo, at right, is a version of my header.
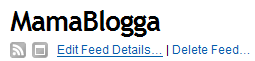 One last capability that isn’t as neat-o as these seven, but is one of the major advantages of FeedBurner is the ability to change your blog address and easily transfer subscribers. Click on Edit Feed Details to find the box where you entered your feed address. Should you move your blog, you can easily update this address to your new one, without sacrificing your subscribers.